Setting Up & Editing Your Profile
Your Omnia Profile is how other members of the Omnia community will see you and learn about you. It is for all intent and purposes your resume to promote your services. In addition, Omnia uses some of the information provided to recommend content that is most relevant and MOST IMPORTANTLY, to share projects that you are a match for.. It is therefore recommended that you are as detailed as possible when completing your profile and that you keep it up to date.
NOTE: Once you sign up to join Omnia, you are able to search for and view information across the Platform. However, until your profile is complete some functionality may be limited. For examples, you will not be able to upload examples of your work or be considered for projects that they might be a match for.
The Creator Dashboard
As soon as your registration as an Omnia has been confirmed, you will be taken to the Creator Dashboard, shown below. This will also serve as your home page when you log into your Omnia account in the future.
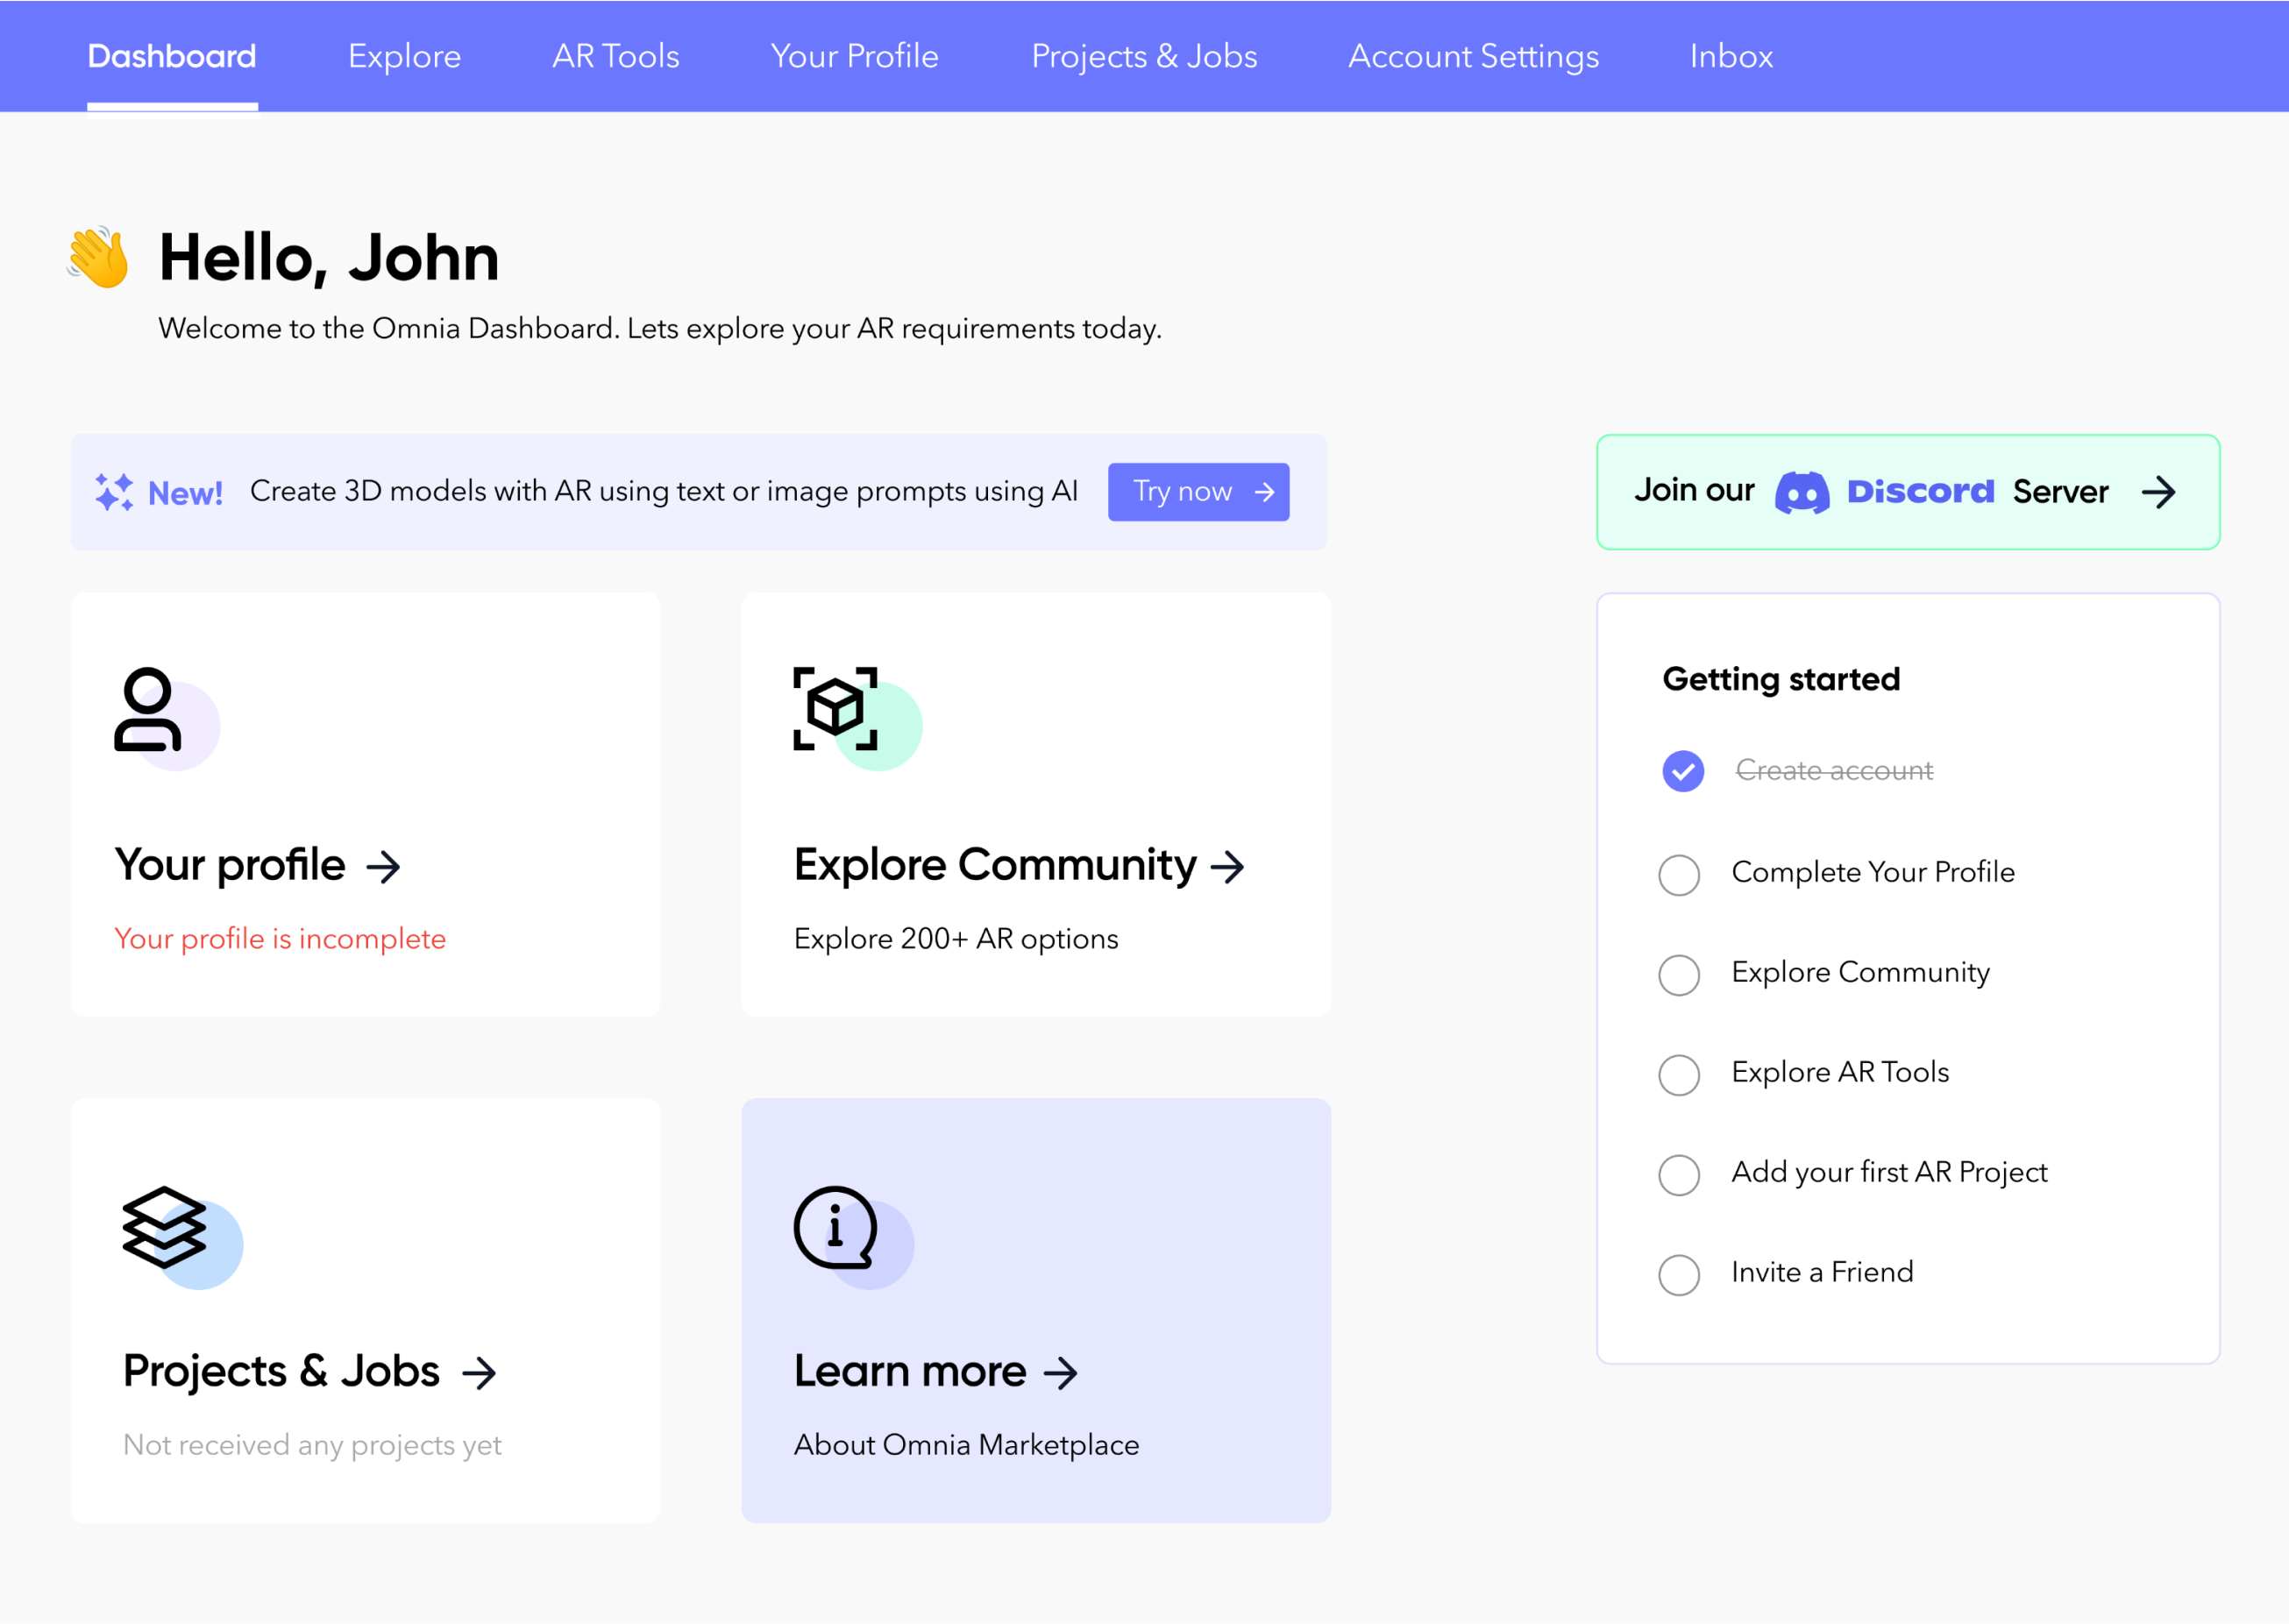
The primary area of the dashboard is divided into 5 sections:
- Your Profile
- Discover AR Options
- Your Project(s)
- Learn More
Your Profile
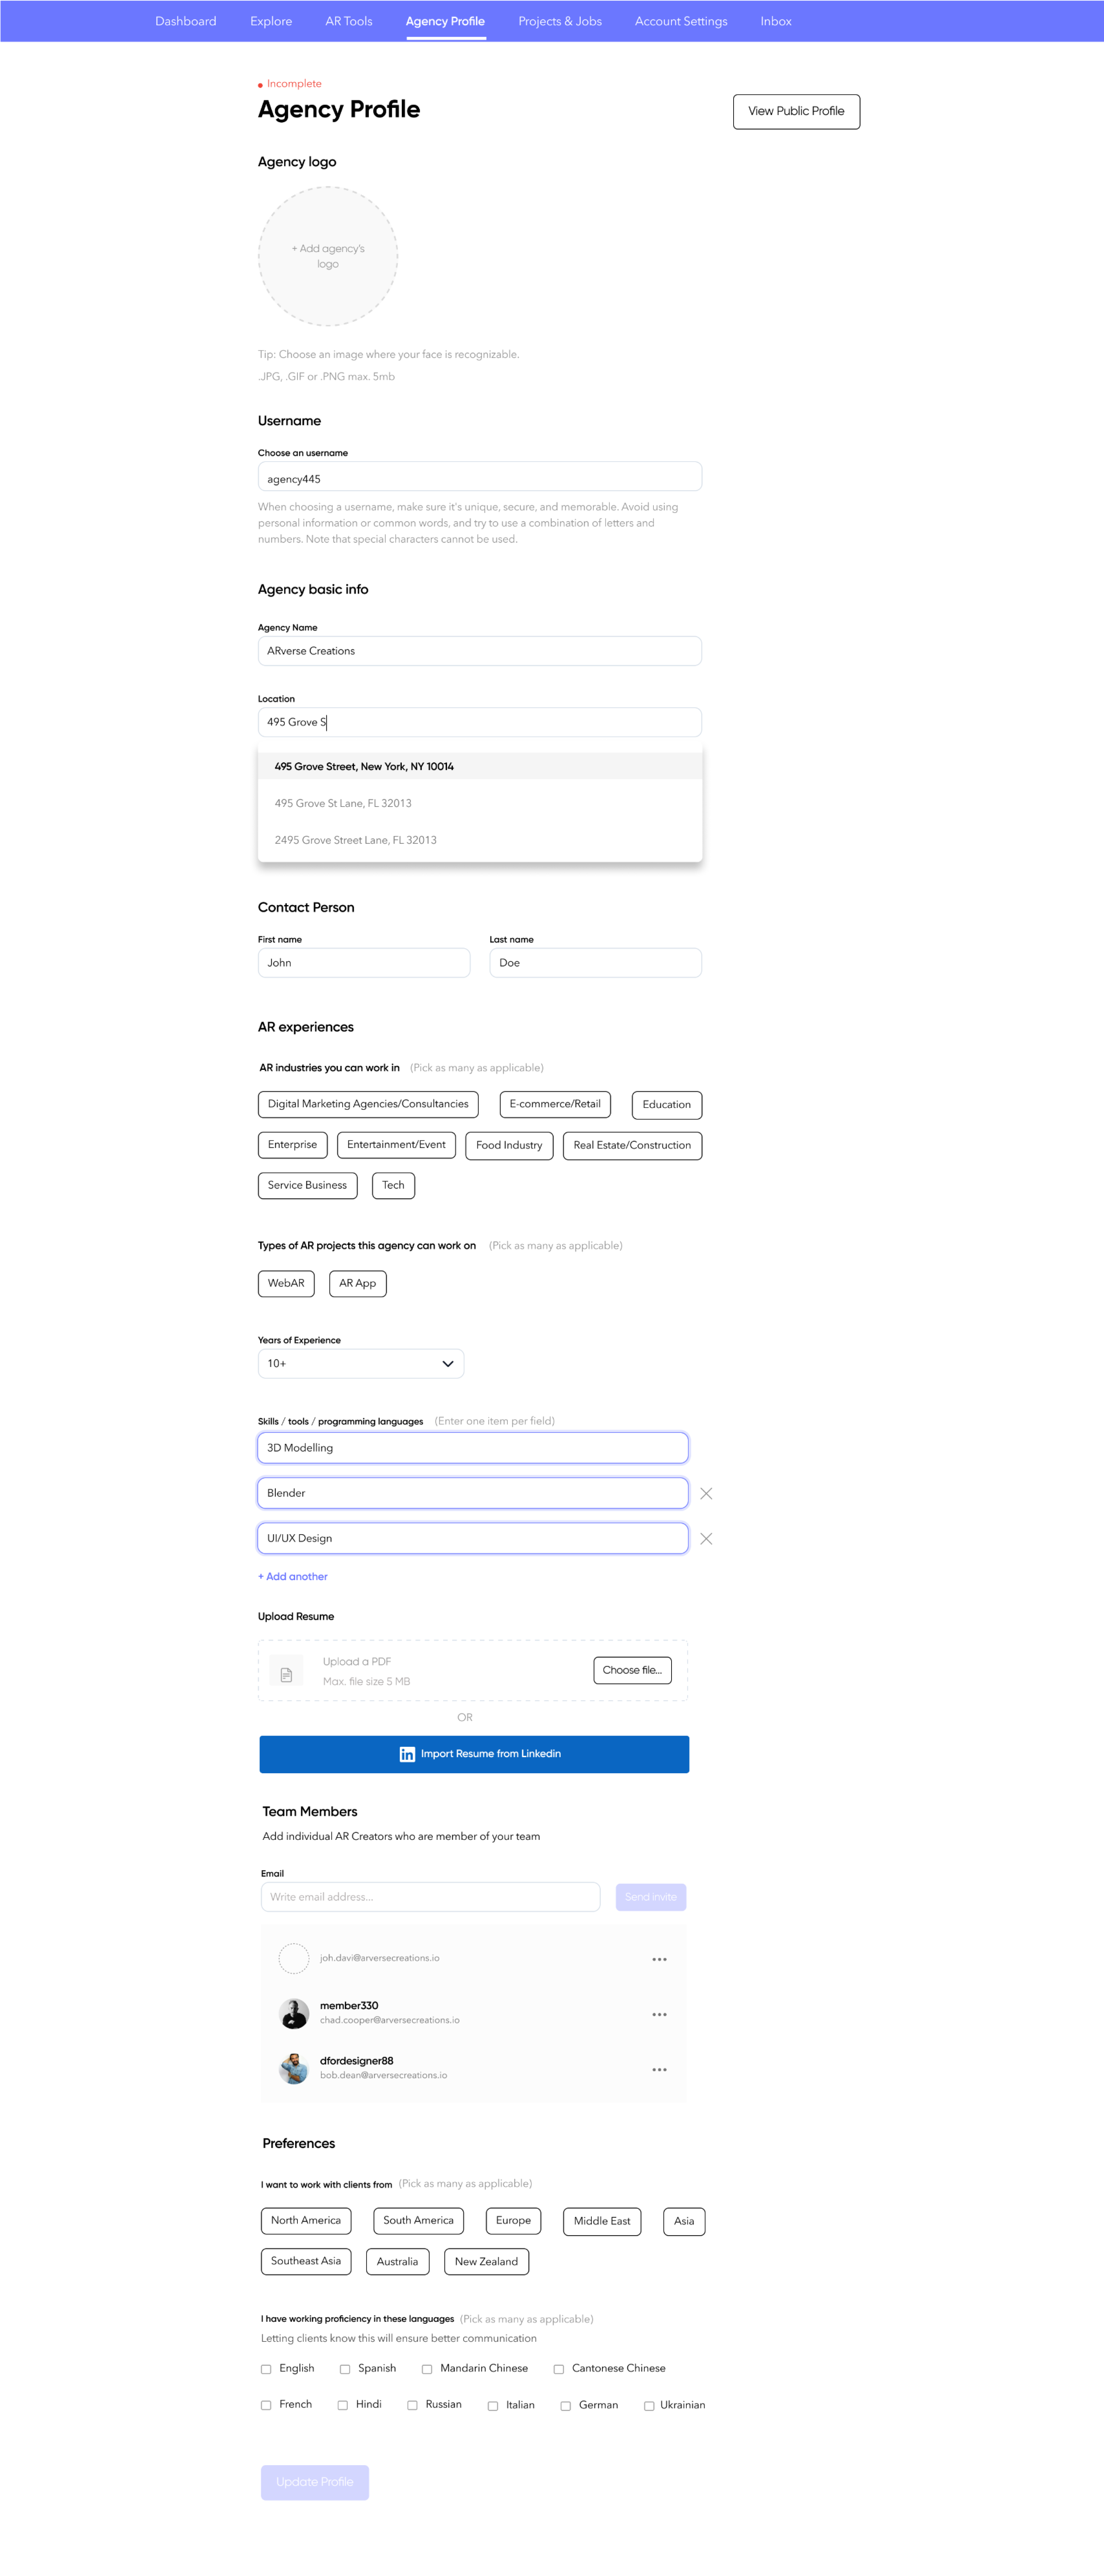
Your profile is where the basic information about your practice and the primary contact is entered. One field to pay special attention too is the Description Field (highlighted below) This not only provides a space for you to describe your skill set, the types of projects you have experience developing, and any industry specific expertise you have. Do not be modest and be specific as this is key information Businesses will use when selecting Creators to hire.
To see how your profile will display to other Omnia members, click the View Public Profile button.
Note: Whether you are an agency with 100’s of developers or a sole practitioner, your profile will be listed as an “Agency”. The only difference, is that if you are an agency, you can add additional team members to your profile.
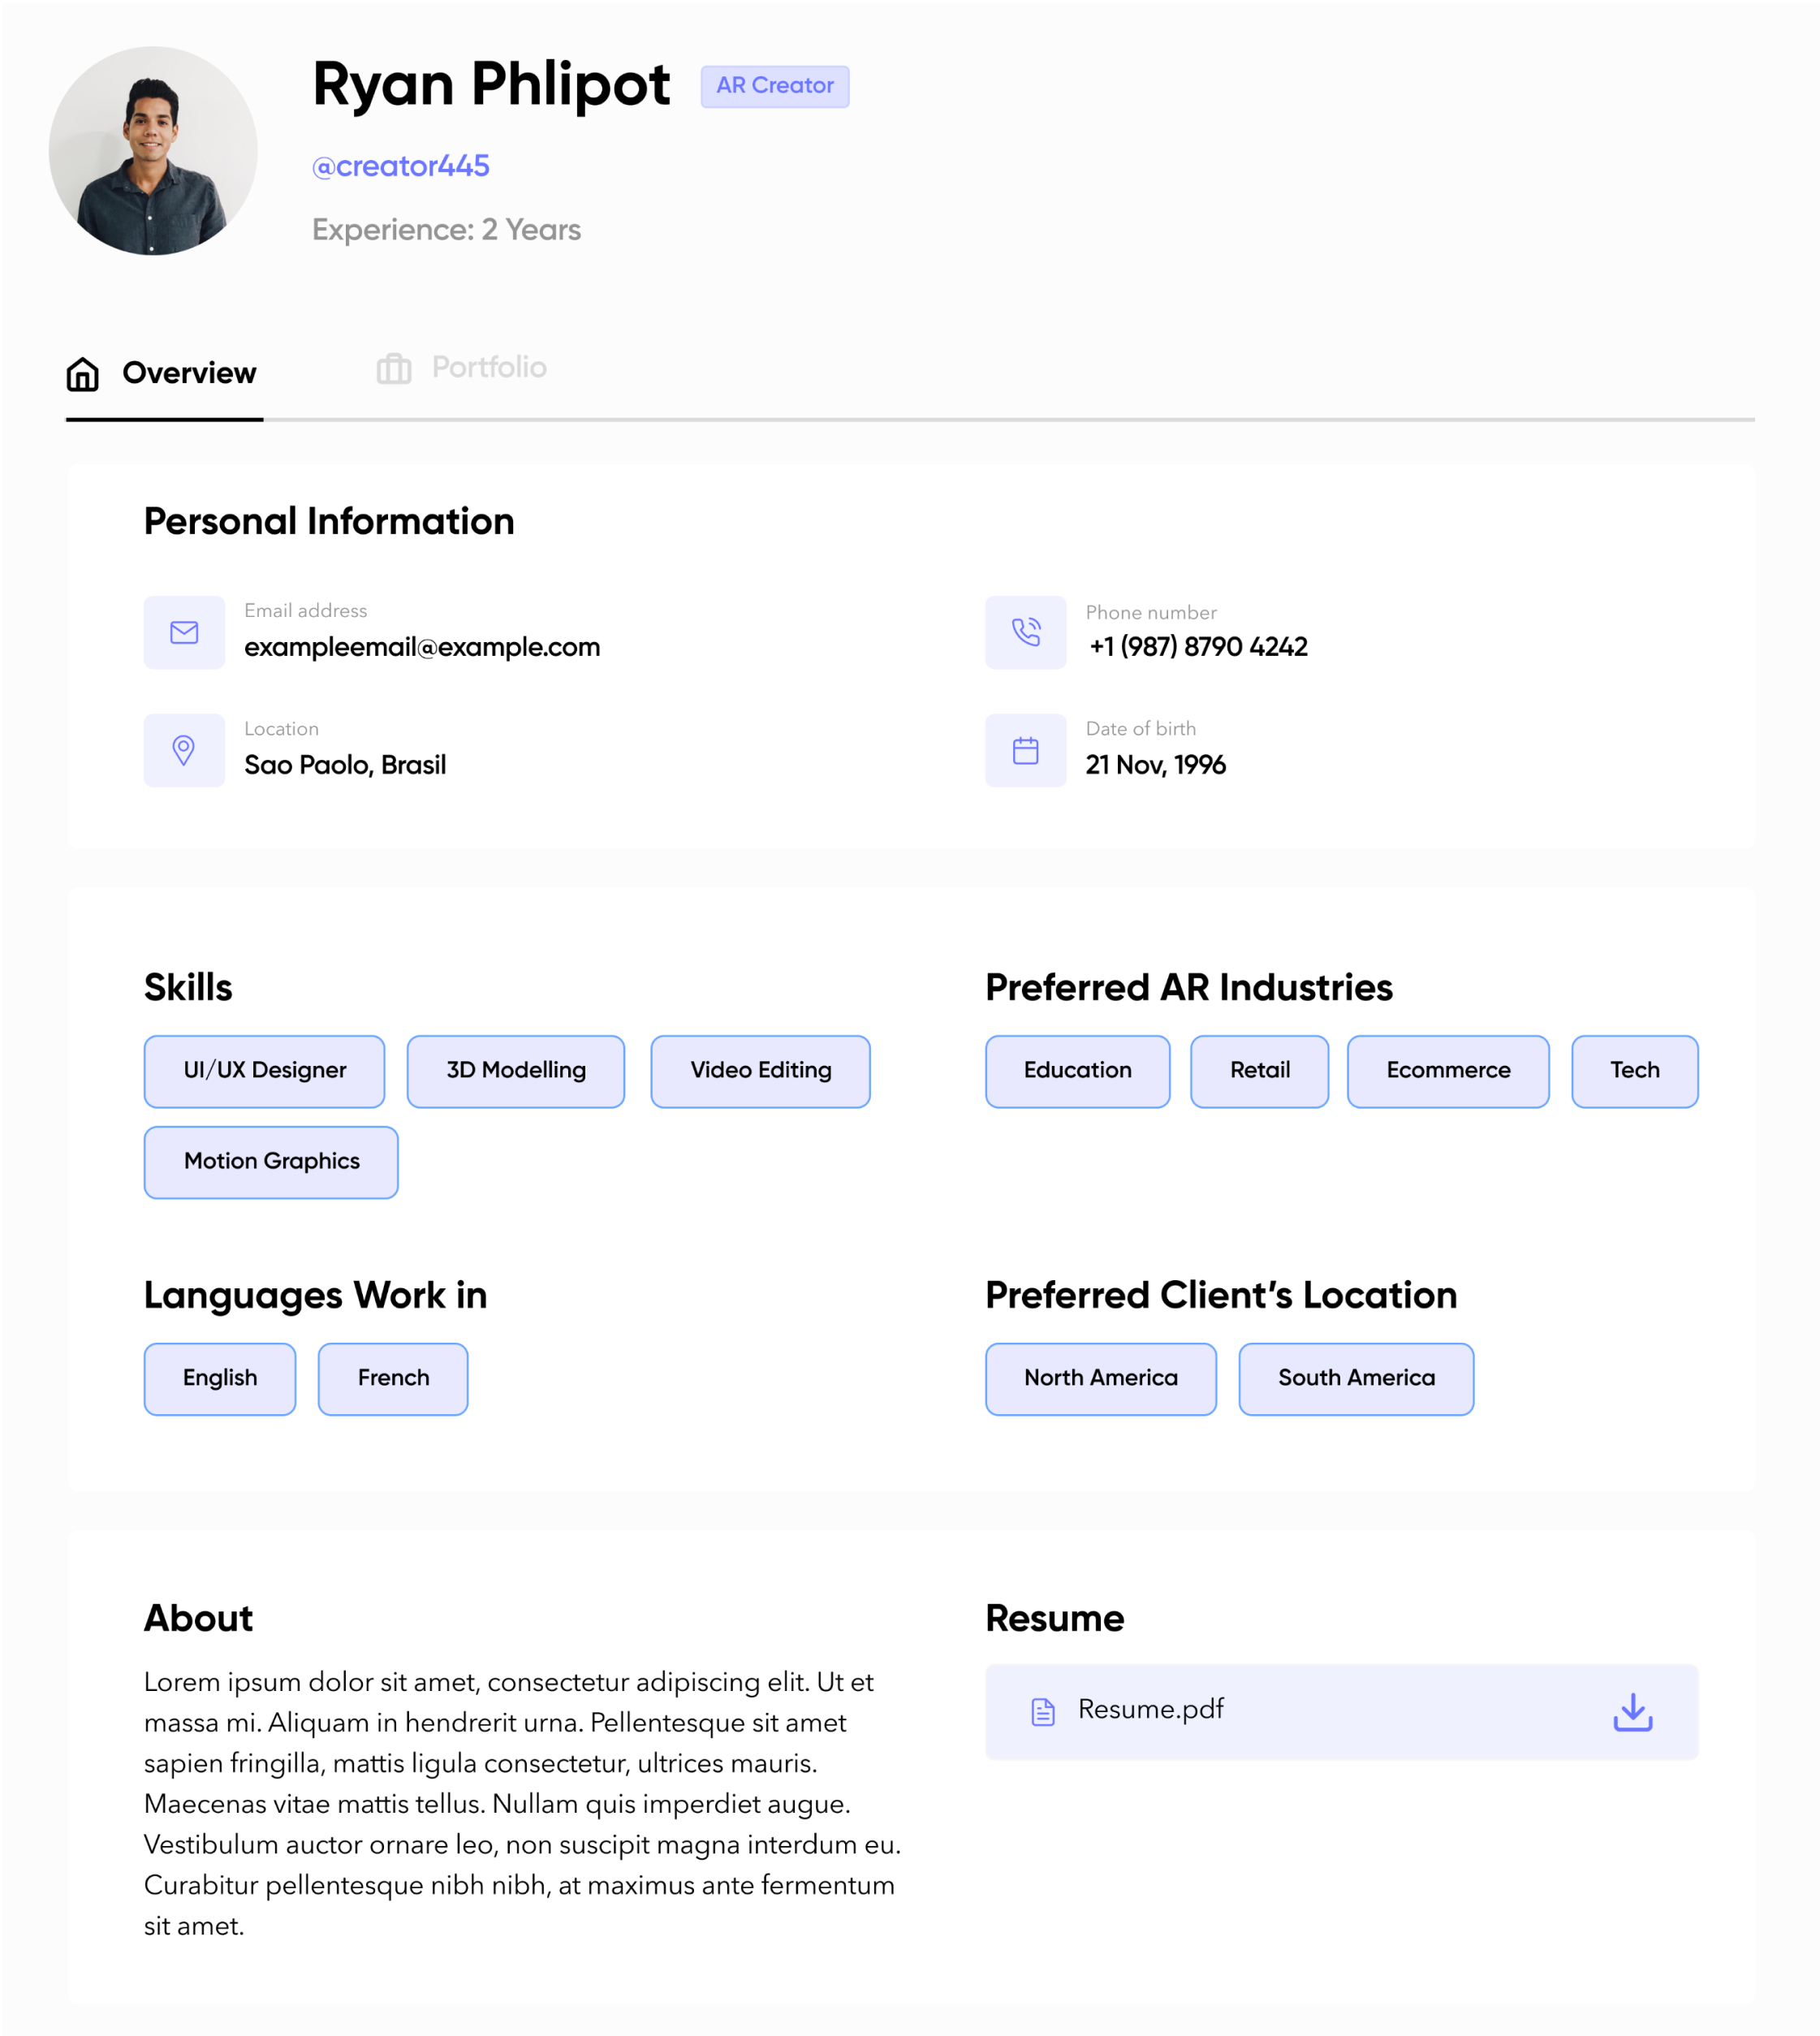
Below is an example of how your Creator Profile will appear when someone views it.
Explore Community
The Explore Community page is where Creators will spend a significant amount of time, as this is where you will go to engage with fellow creators, post projects you you want to promote (in other words show off your skills), engage with Businesses, and find new development tools to test and license. It is basically, your gateway to the Omnia Community Board.
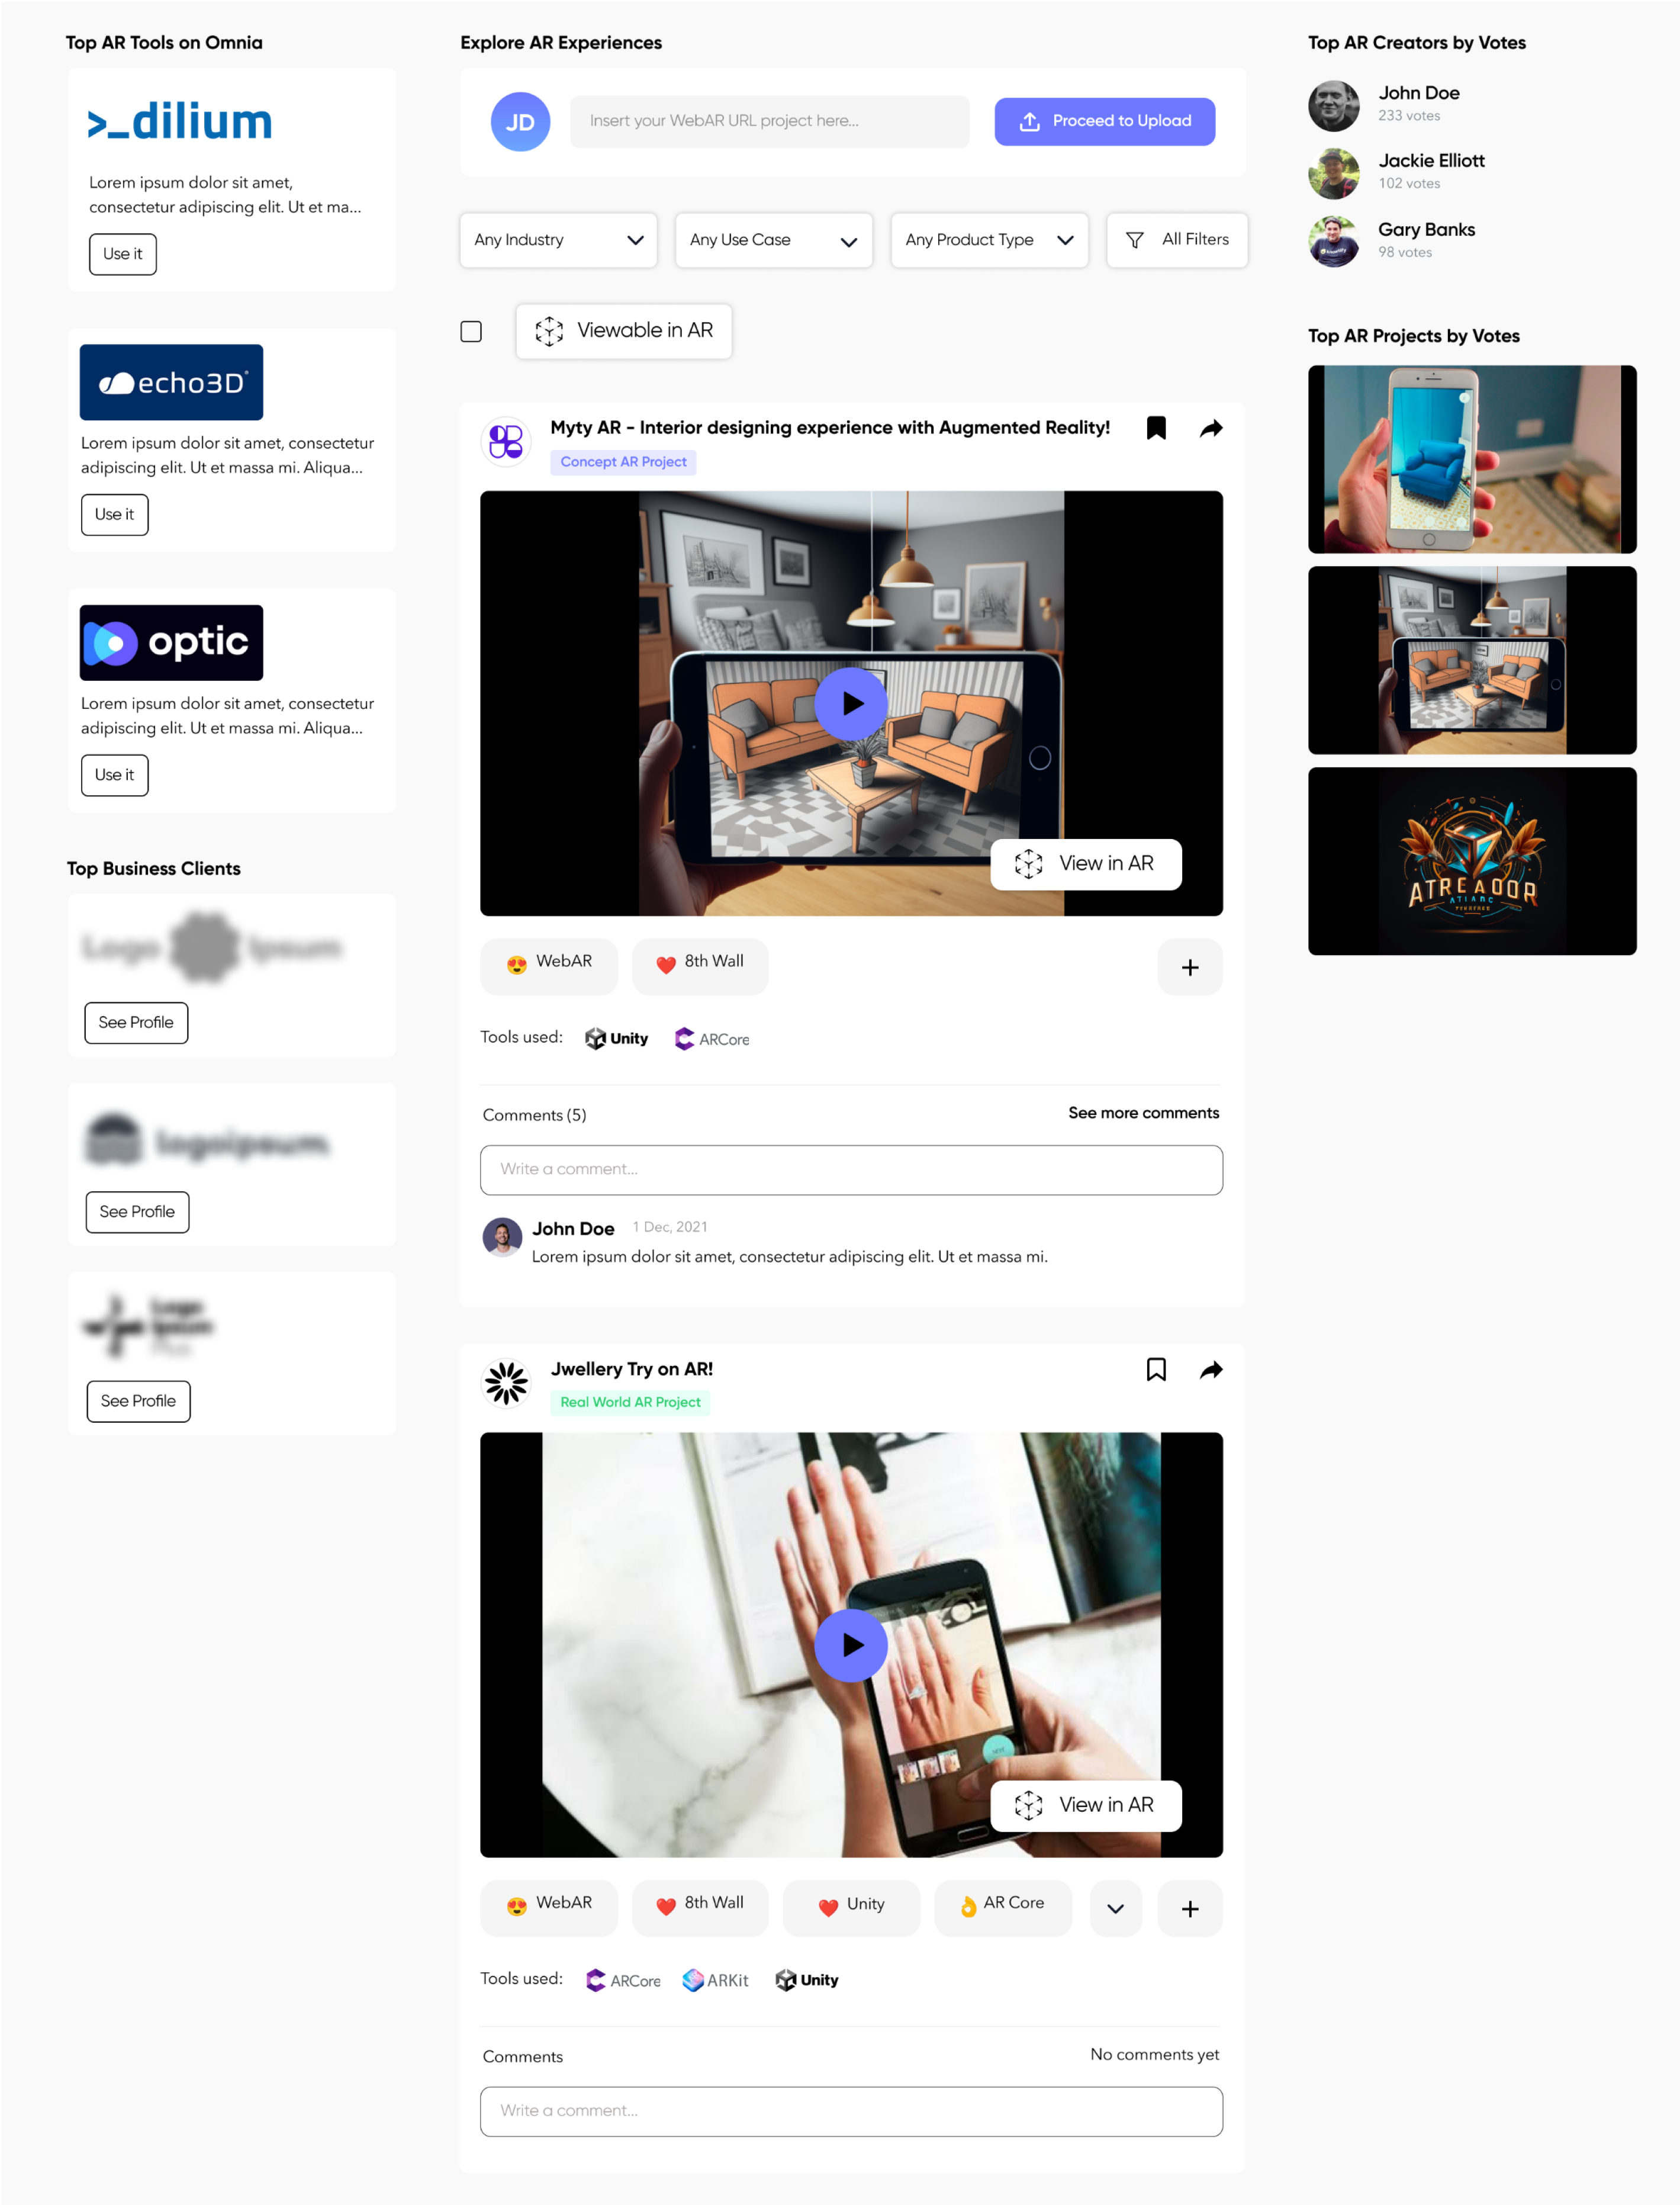
The community board operates like many other UGC (user generated content platforms) allowing you to:
- Upload new content, either comments, videos, a WebAR Link or even a AR File for others to view in AR
- Filter the feed to more easily and quickly find content you are interested in based on numerous criteria such as Industry, Use Case, Development tools, etc.
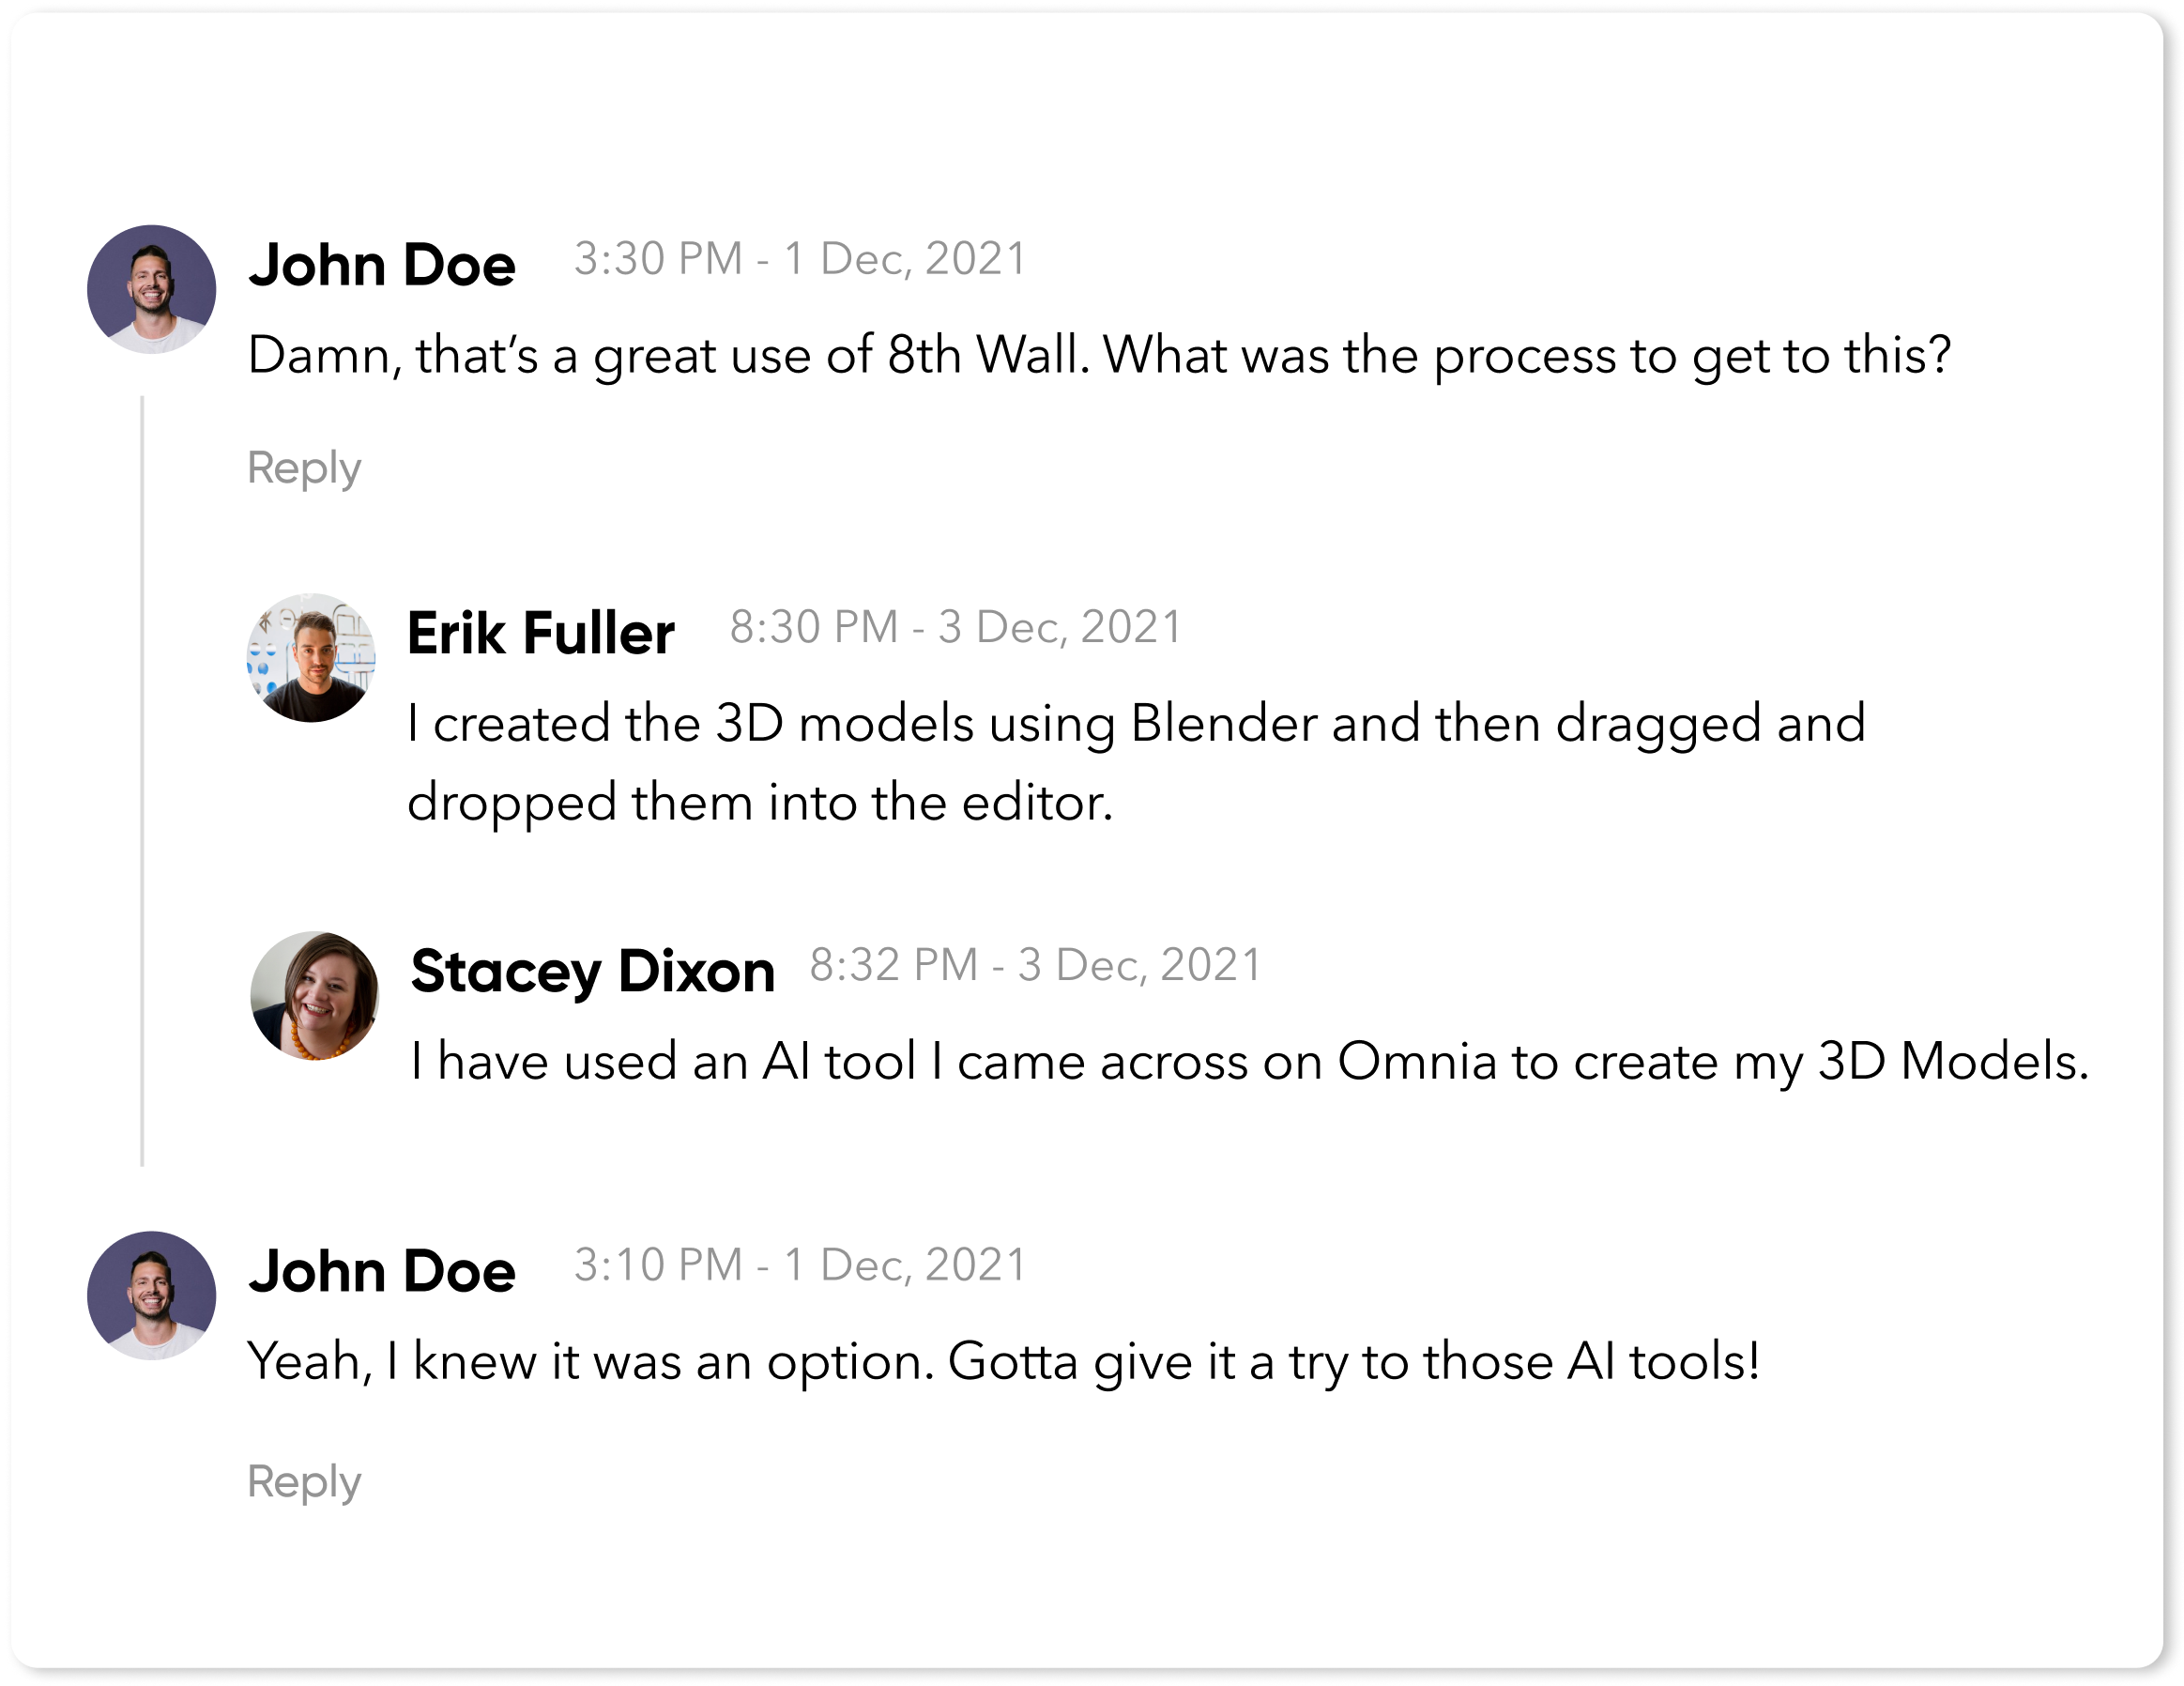
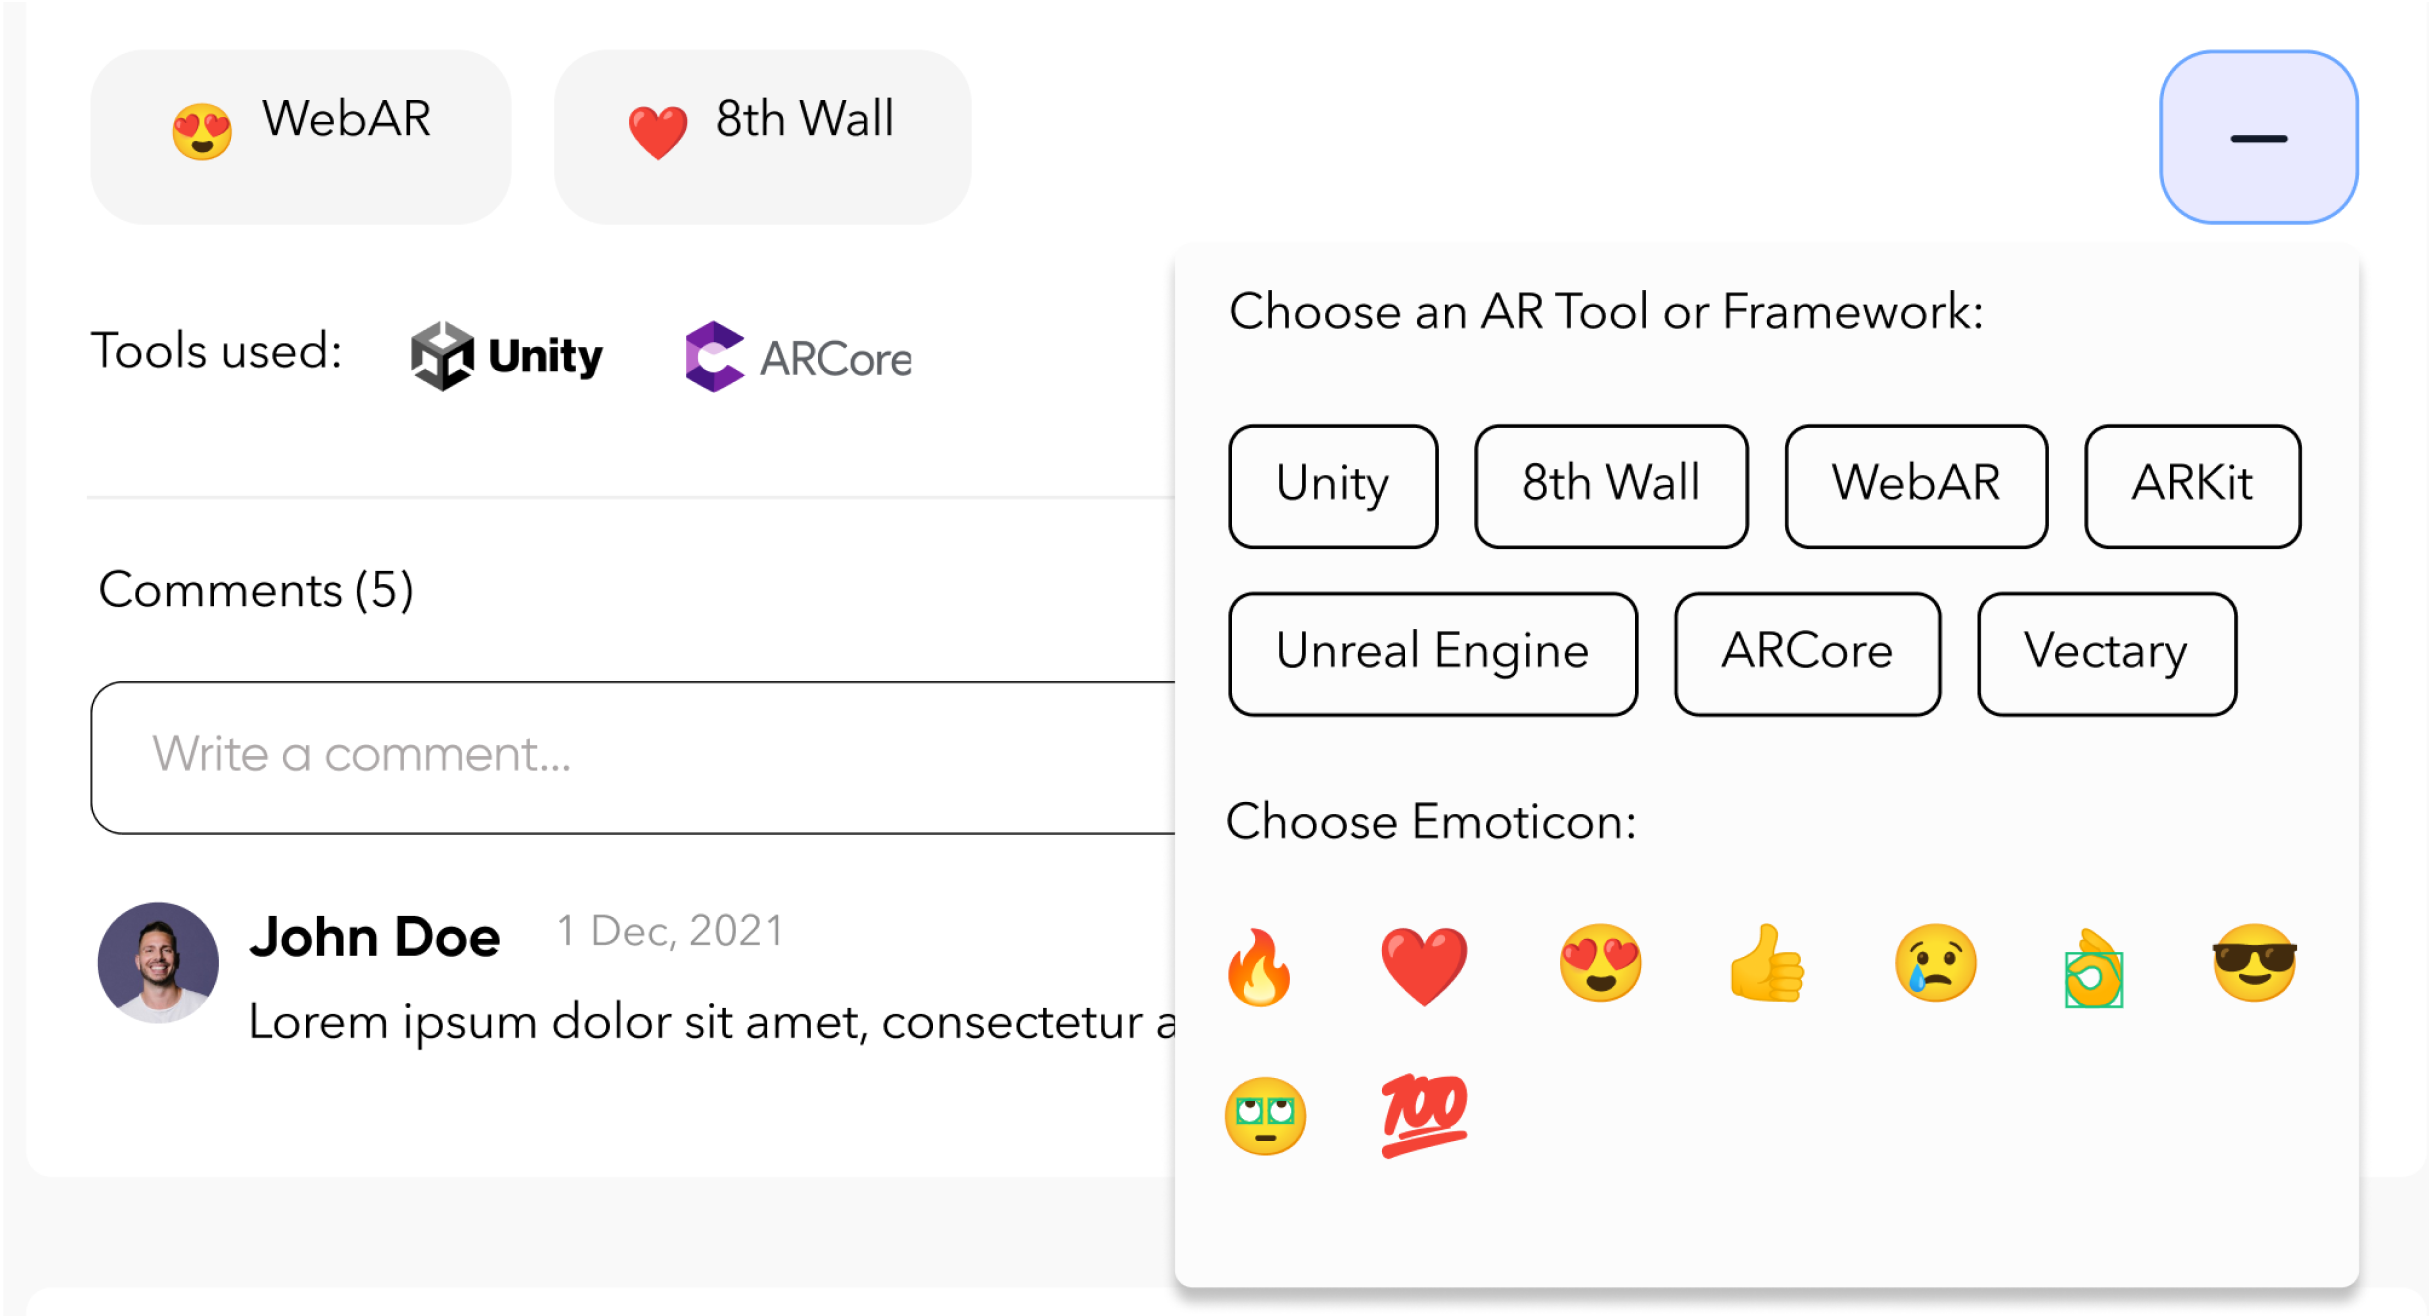
- Add comments to other posts, pose questions, or add content via emoticons
Click HERE to learn more about uploading AR projects to the Omnia Community Center
Click HERE for more details about previewing projects in AR

Projects and Jobs
The Projects & Job section is where you will find Project Briefs that Omnia has forwarded to you for your consideration and where you will:
- Engage with prospective clients regarding projects
- Submit bids
- Accept Contracts
- Manage Projects you are working on
For more detailed instructions on accepting and managing Projects and correspondence with Businesses click HERE.
Learn More
The Learn More button is your direct link to the Omnia help files where you can find additional information about all aspects of the Omnia Platform. If you do not find what you are looking for, or have additional questions, email support@theomnia.io or click here to access the Omnia support Discord Channel.
Adding AR Files & Projects to Your Creator Profile
The most effective way to promote yourself and / or your agency on Omnia is by sharing examples of your past work. There are two ways you can share your work, publicly to the entire Omnia Community via the Community Page or only to people who are seeking you our via the Portfolio section of your Profile. Regardless of whether you upload content for public consumption via the Community Page, or private consumption via your Portfolio if the content was created for a client (in other words you do not own it 100%) make sure you have permission to use the content for your own marketing efforts, including online marketing. You will be asked to confirm that you either own the uploaded content or you have explicit permission to share it online for your marketing efforts.
Uploading For the Public to the Omnia Community Portal
After logging in to the Omnia, you will see a link to upload content to the Community Portal.

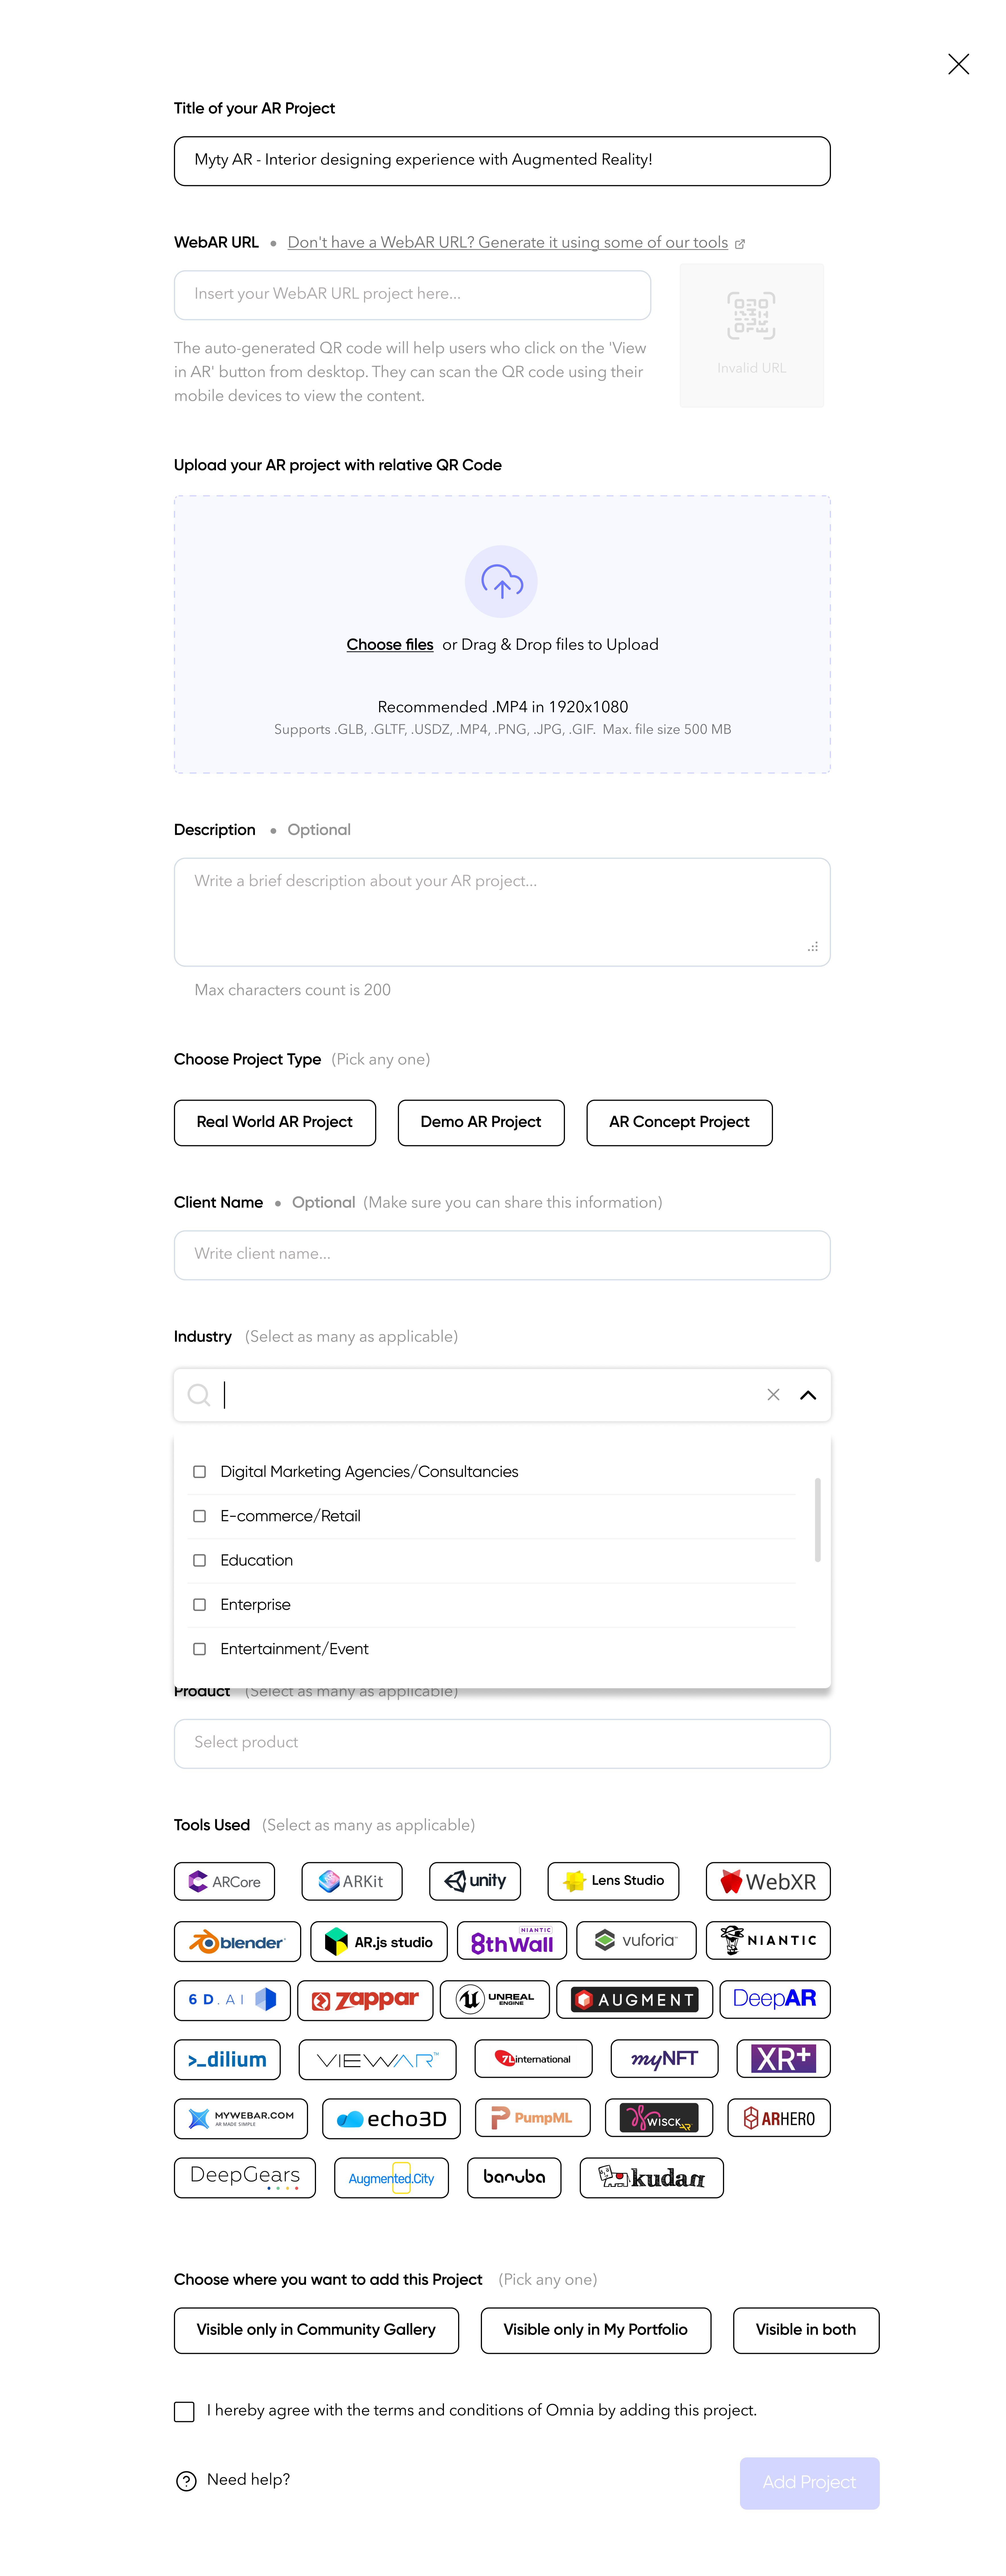
This will start the process of uploading, cataloging, and tagging your content as depicted in the screens below.. You are highly encouraged to take a few minutes and fill out all the requested information, as it is used by Omnia to match you to prospective projects and to help others find Creators based on certain experience. In particular, for WebAR projects, make sure to create QR code so visitors can experience your project in AR
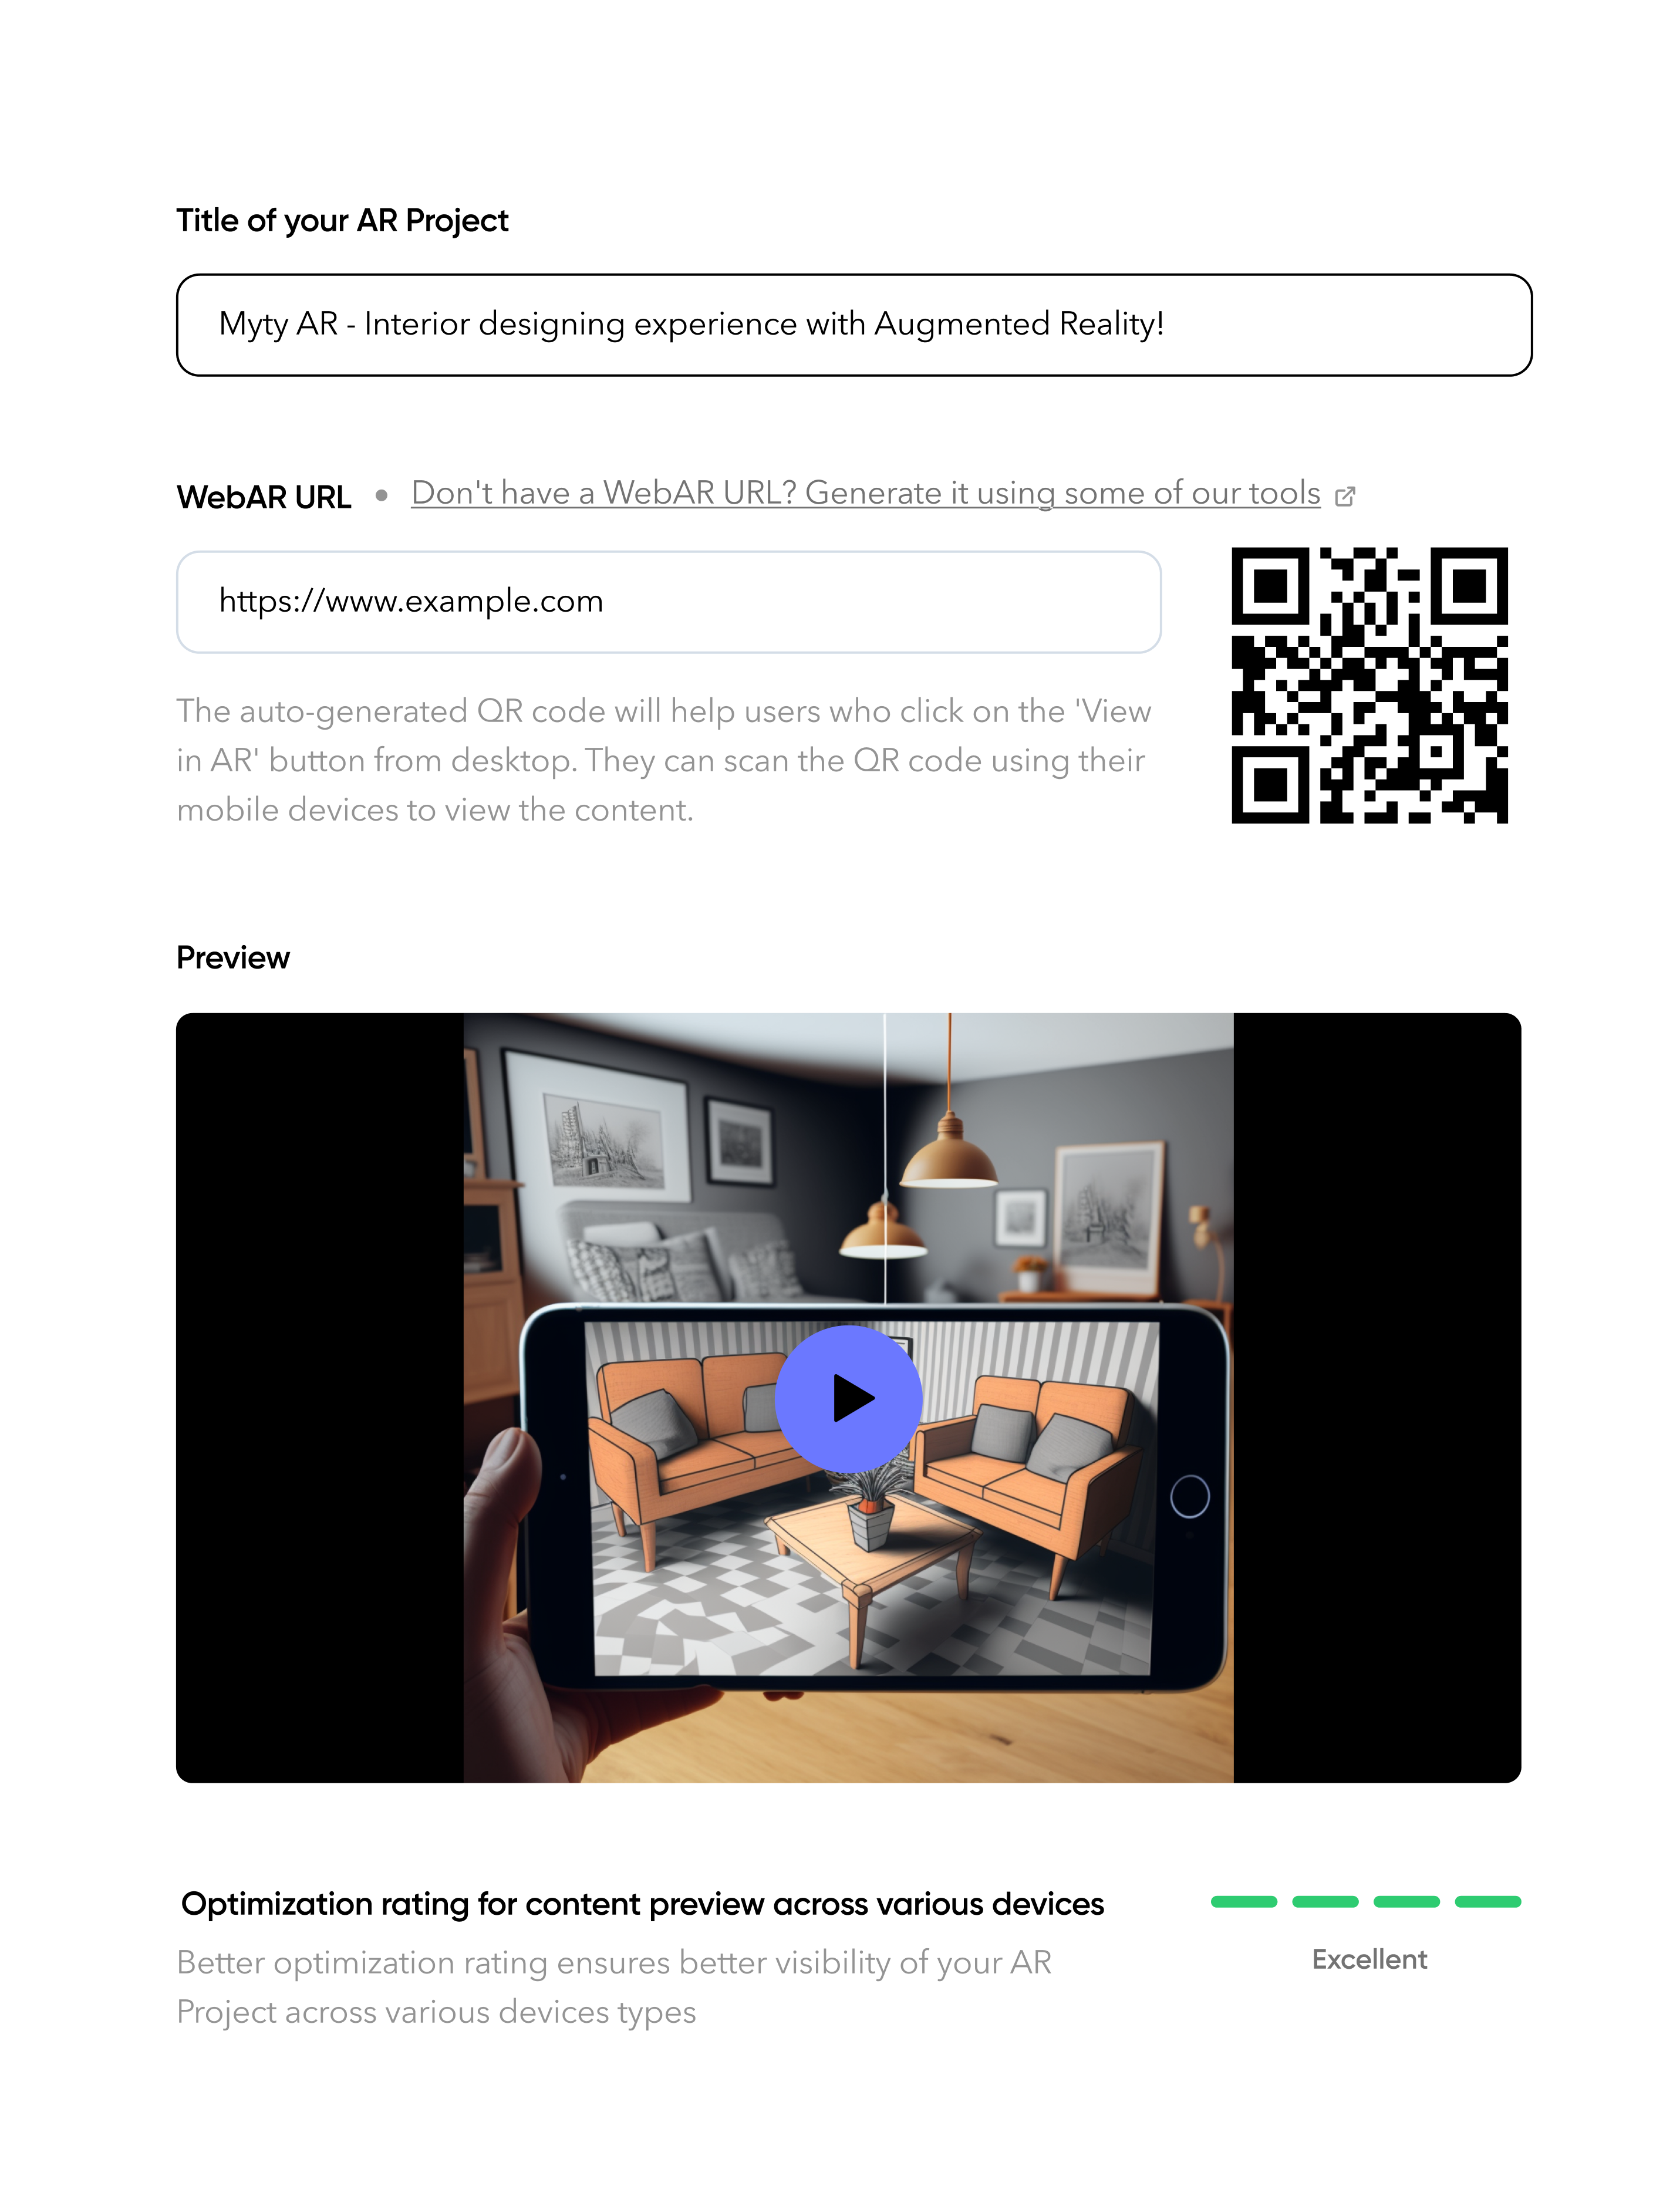
After your project has been uploaded you will be able to see how it appears to others and if it is a WebAR project, test the QR code that was assigned. Lastly, Omnia will provide a rating based on how well the project is optimized to be viewed across different devices
Uploading Content to your Portfolio
Uploading content to your Portfolio is very similar to uploading it to the Community Page, the only difference is that it will only be visible to people who view your profile page. To add content to your Portfolio:
- Go to your Profile Page
- Click the Portfolio Tab
- Click the Proceed to Upload button
- Continue the Upload process as described for adding content to the Community Page
If you want to more a file from your Portfolio to the Community Page, you can do so by clicking the elipse to the right of the Project name, selecting Edit.
You might also like
